Do you want to print transparent labels to achieve a no-label look? But you still want important text and elements on the label to be opaque rather than show through? Our video tutorial and step-by-step guide will show you how to correctly create opaque white in your print file.
Step-by-Step Tutorial:
Set up HPI White in Adobe Illustrator CC: Transparent Labels
In this tutorial we will show you how to correctly apply opaque white on transparent labels using Adobe Illustrator. The images on the side are there to clarify the process. You should apply the following four steps:
- create spot colour “HPI-White”
- create layers
- colour elements with “HPI-White”
- check colours with the separation preview tool
1. Create Spot Colour HPI-White
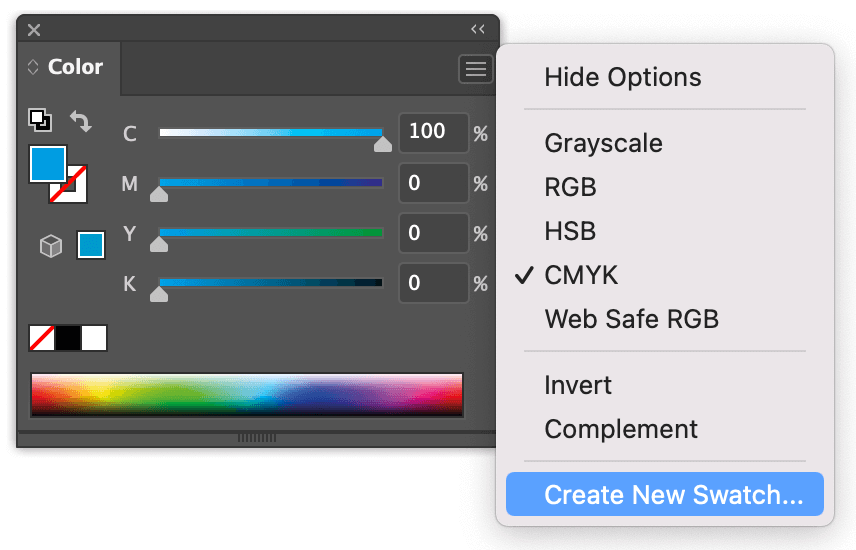
First you need to create a new colour swatch. In order to do so, call up the colour control panel. Navigate there via the bar at the top of your screen. Click on Window ![]() Colour. Use the
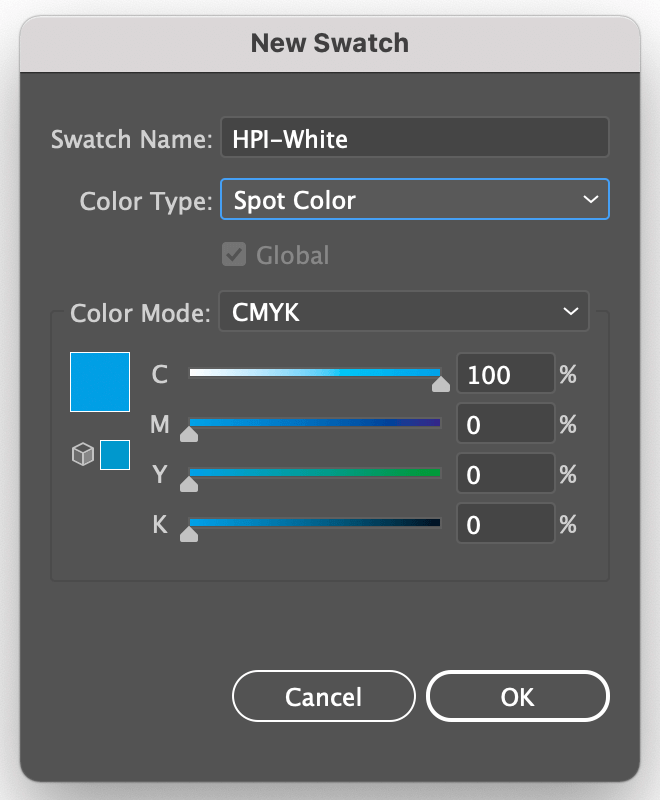
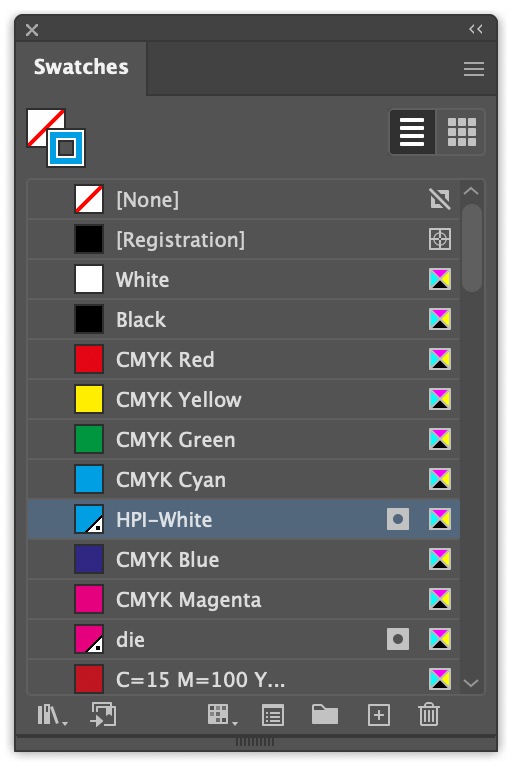
Colour. Use the ![]() list function to assign the following colour values: C100 M0 Y0 K0. Then select the option Create a new color swatch. Name the color patch name with HPI-White. Change the color type to Spot Color. The spot color you just created is listed in the Color Swatches panel. Now select create new colour swatch which you will also find in the
list function to assign the following colour values: C100 M0 Y0 K0. Then select the option Create a new color swatch. Name the color patch name with HPI-White. Change the color type to Spot Color. The spot color you just created is listed in the Color Swatches panel. Now select create new colour swatch which you will also find in the ![]() list function. This colour swatch must be named “HPI-White”. Then change the colour type to spot colour [Ill.: 1.2]. Click on OK to confirm everything. The
list function. This colour swatch must be named “HPI-White”. Then change the colour type to spot colour [Ill.: 1.2]. Click on OK to confirm everything. The ![]() spot colour you just created can now be found via the control panel Window
spot colour you just created can now be found via the control panel Window ![]() Swatches.
Swatches.
2. Creating Layers
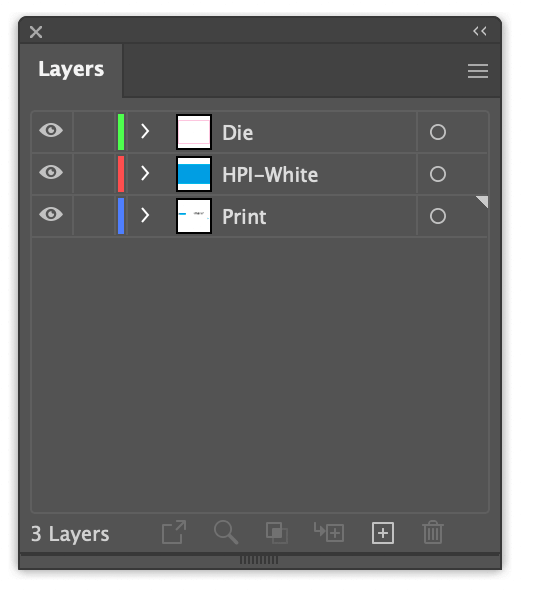
Now, create the following layers in your file: print layer, opaque white and die cutter. These layers do not have any influence on the assignment of your colours, but are merely there for your own convenience. You need to make sure that the opaque white elements are created over the printing colours. In the next step, click on Window again to call up the ![]() Layer control panel. Click on the plus symbol in the lower right corner of the panel to
Layer control panel. Click on the plus symbol in the lower right corner of the panel to ![]() create a new layers [Ill.: 2.1]. You can change the name of the layer by double clicking on the respective layer. Enter the name and confirm with OK. It is important that you place the individual elements on the correct layer. To do this, select the objects with the
create a new layers [Ill.: 2.1]. You can change the name of the layer by double clicking on the respective layer. Enter the name and confirm with OK. It is important that you place the individual elements on the correct layer. To do this, select the objects with the ![]() selection tool. A small square will now be displayed to the right of the layer. You can use this square to place elements on their correct layer. To do so, just drag the square to the desired destination. Now, repeat these steps until all elements are placed on the correct layer.
selection tool. A small square will now be displayed to the right of the layer. You can use this square to place elements on their correct layer. To do so, just drag the square to the desired destination. Now, repeat these steps until all elements are placed on the correct layer.
3. Use HPI-White on Certain Elements
When printing on a transparent material, there are two reasons to create the colour opaque white or HPI-White:
- to print white elements
- coloured elements, such as text or images are to be opaque. In this case the opaque white is printed first and the coloured area above it.
3.1 Create White Elements
Use the ![]() selection tool to select the elements which are to be printed white. Assign the spot colour HPI-White from the colour panel and make sure that the elements are on the HPI-White layer.
selection tool to select the elements which are to be printed white. Assign the spot colour HPI-White from the colour panel and make sure that the elements are on the HPI-White layer.
3.2 Set up Opaque White to Print Opaque Coloured Elements
Select the elements that are to be opaque with the ![]() selection tool. Use the key combination cmd
selection tool. Use the key combination cmd![]() +c (Windows: Strg.+ c) to copy these elements. Now, select the opaque white layer and use the key combination cmd
+c (Windows: Strg.+ c) to copy these elements. Now, select the opaque white layer and use the key combination cmd![]() +f (Windows: Strg.+ f) to paste the copied elements to the original position on the opaque white layer. Call up your colour swatches again, by clicking on Window
+f (Windows: Strg.+ f) to paste the copied elements to the original position on the opaque white layer. Call up your colour swatches again, by clicking on Window ![]() Swatches. Now colourise the selected elements with the spot colour HPI-White. It is important to set these elements to overprint to make sure that the underlying colours will be printed as well. To do this, use the
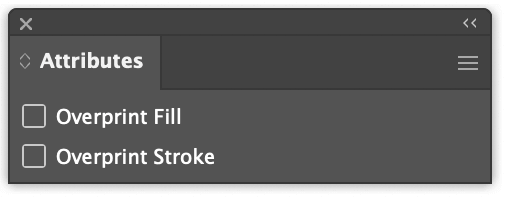
Swatches. Now colourise the selected elements with the spot colour HPI-White. It is important to set these elements to overprint to make sure that the underlying colours will be printed as well. To do this, use the ![]() selection tool to select the respective elements and set them to overprint fill or overprint stroke using the attributes panel (Window
selection tool to select the respective elements and set them to overprint fill or overprint stroke using the attributes panel (Window ![]() Attributes).
Attributes).
4. Check the Colours with the Separation Preview
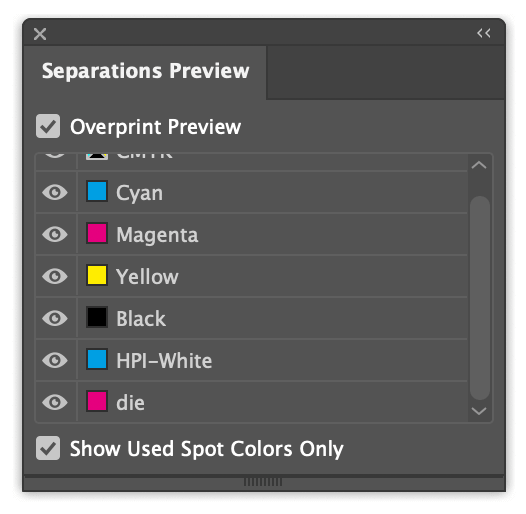
To see if all colour separations have been set up correctly use the Window ![]() Separation Preview. When
Separation Preview. When ![]() hiding the “HPI-White” colour channel, make sure that the coloured areas underneath are displayed and not cut out [Ill.: 4.1]. The areas that are printed exclusively white should be cut out.
hiding the “HPI-White” colour channel, make sure that the coloured areas underneath are displayed and not cut out [Ill.: 4.1]. The areas that are printed exclusively white should be cut out.