Meet our Artwork Assistant! Fast and efficient processing of your label order is particularly important to us. We therefore offer you the opportunity to create and submit an error-free label artwork file. This provides our pre-press department an optimally prepared file for production which in turn means we can get started on your order quicker and you can receive perfectly printed labels sooner. Simply follow the steps below and fill in the required data/parameters. You will then receive print-template file in PDF format by e-mail.
Label Template Specification


Using Your Label Template
1. Opening Your Label Template
![]()
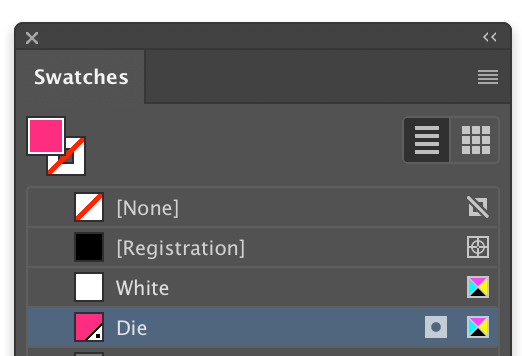
Open the AI template found in your email inbox using Adobe Illustrator. You’ll notice that the file is the size that you specified above, including an additional 2.5mm print bleed. If you selected the label shape as “square” or “circular”, the print die (magenta) is already set up in the required format. Where you selected the “custom shape” option, the print die can be found as a custom-shaped contour and is a placeholder only. You will need to create a custom cutting die in Adobe Illustrator using the “pen” tool. It is important that your desired die contour is set up as the spot colour “die” using the Window > Swatches control panel. Fig 1.1
2. Fill Areas with "Technical" Spot Colours (Where Applicable)
![]()
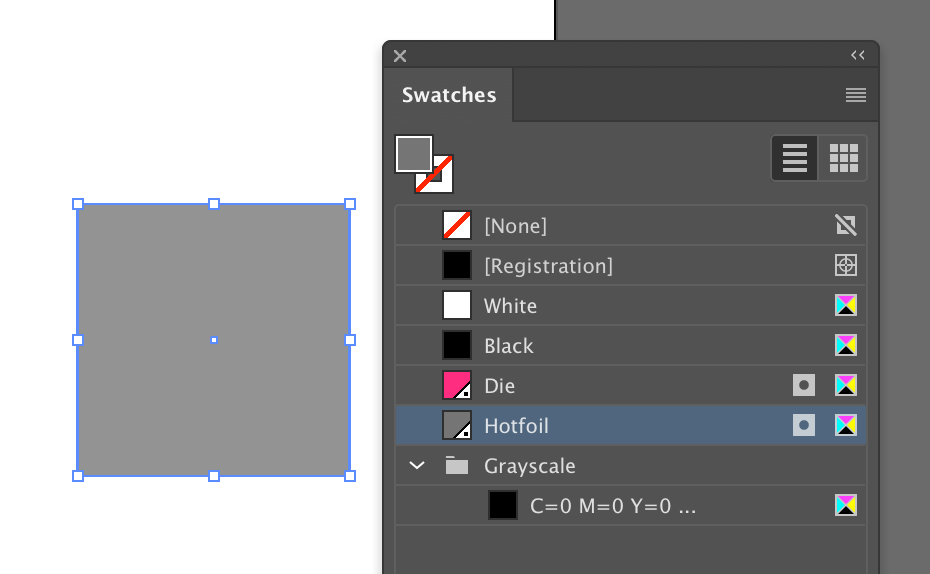
Any areas or lines you wish to be produced as either hot foil or HPI-White ink must now be “filled” with the correct “technical” spot colour. As with the print die this can be done by using the Window > Swatches panel. Use the “Selection Tool” in the tool panel to select the individual elements. Fig 2.1
Please note; where your label neither features hot foil nor HPI-White ink, this step can be skipped.
3. Move Elements to Layer
![]()
Any elements of your label design that have been set up as spot colours will now need to be moved to their corresponding “production” layer. Open Window > Layers and use the “Selection Tool” to select such elements. Now, within the Layers panel only, drag the small square on the right side to the correct layer.

4. Set "Technical" Spot Colours to Overprint
![]()
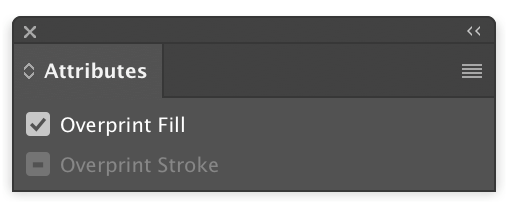
The elements which you have filled with the respective technical spot colour (e.g. “foil”) must now be set to “overprint”. Select these elements with the selection tool (in the tool control panel) and bring up the attributes control panel under Window (Window > Attributes). Click on the option Overprint area [Fig.: 4.1] for Areas. For a contour line, select the “Overprint Stroke” option. The “Overprint” option ensures that the surfaces under the object to be overprinted are continuous and not omitted.
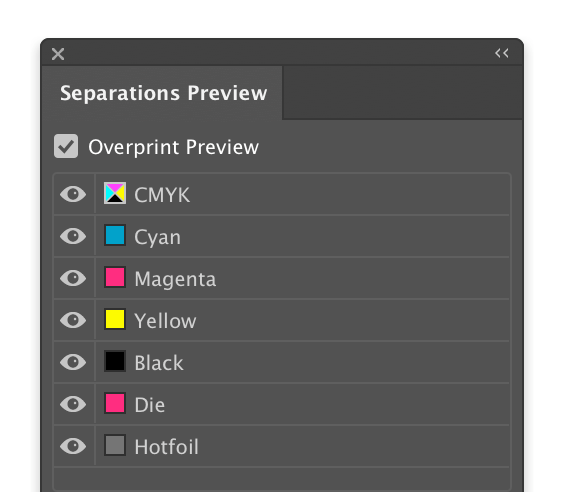
5. Check Technical Colours with the Help of the Separation Preview
![]()
In order to double-check whether the layers have been set-up as desired, open up the Separation Preview control panel under Window (Window > Separations Preview.) To check the separations, check the Overprint preview checkbox. Then you can use the hide and show option to separate the individual colours present in the document for checking.
6. Export Finished Artwork File as PDF
![]()
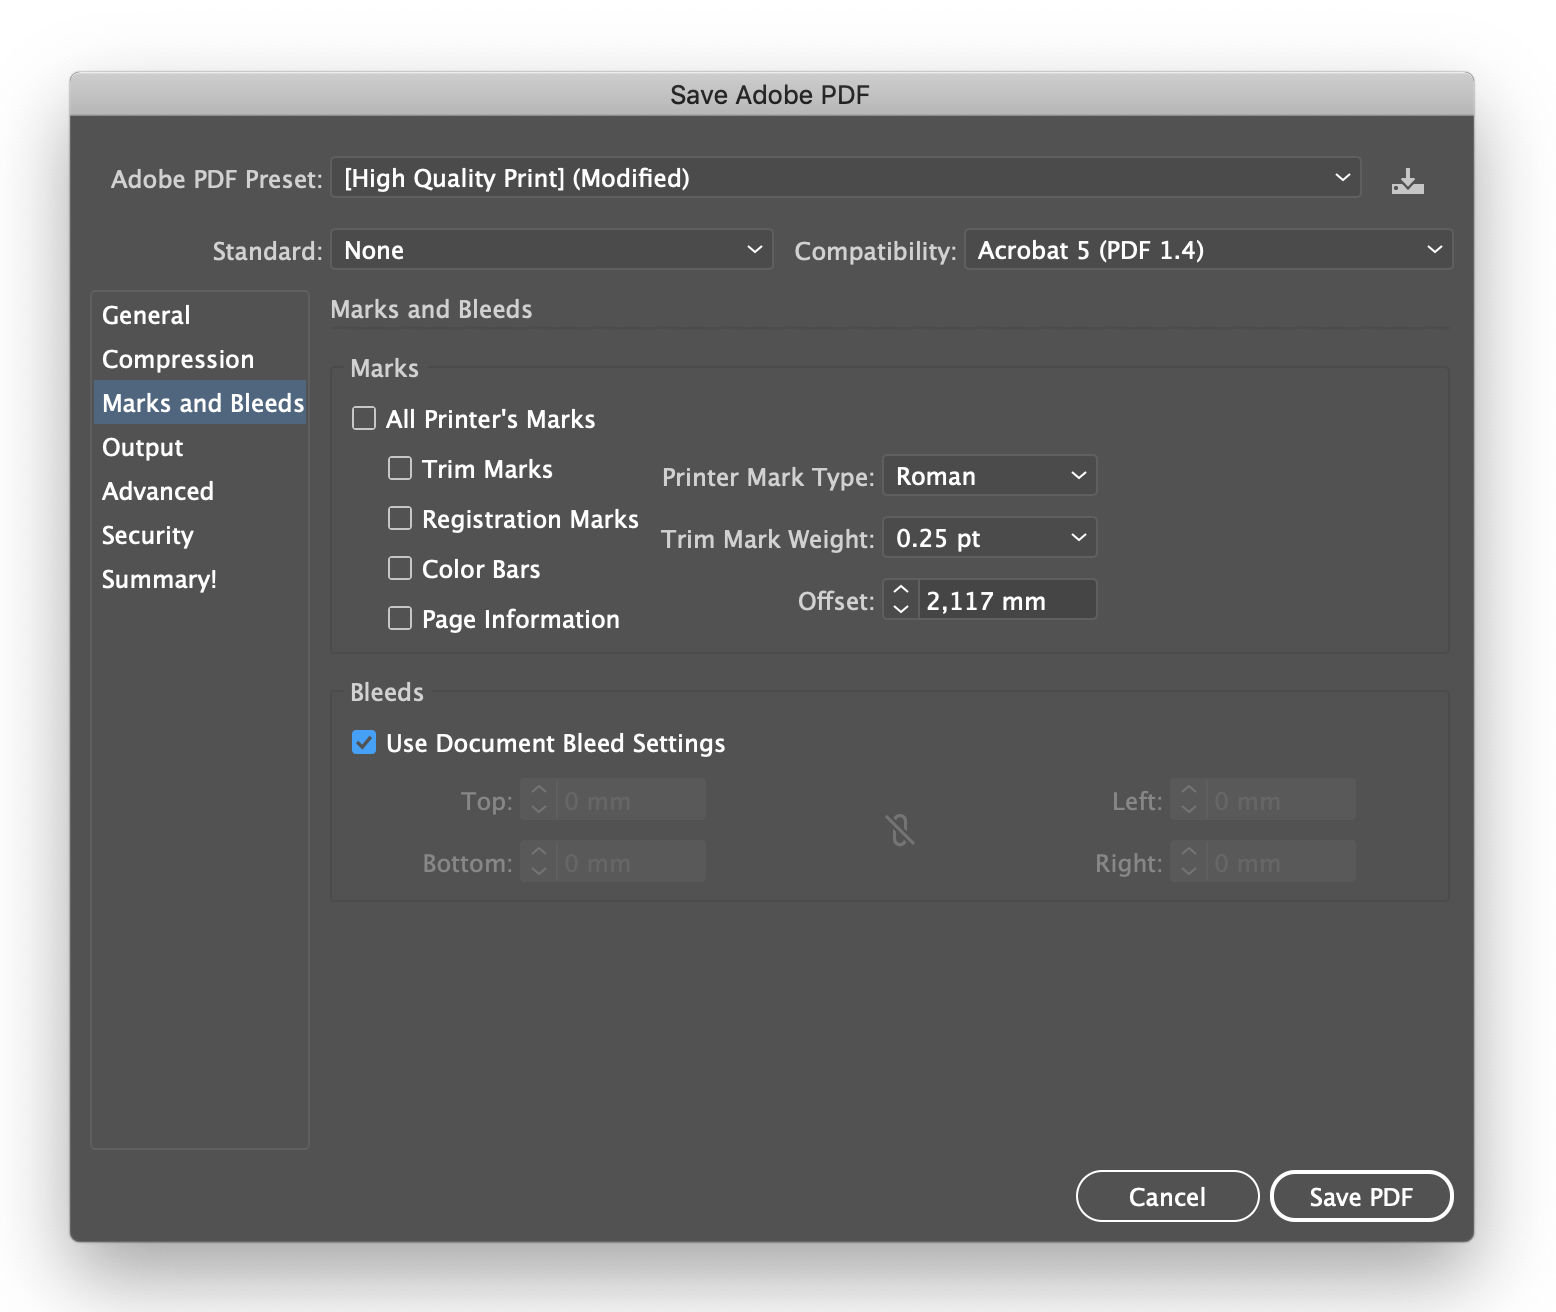
After all spot colours have been created correctly, the PDF can be exported for printing. To do this, select the option > Save as… in the bar at the top under File. A window will then open in which you can name the file and select a storage location. In addition, select the file type Adobe PDF (pdf) in the Format option. Then click the Save button. In the window that now opens, set the settings in the Adobe PDF preferences to [High-quality printing]. On the Markers and Bleed tab on the left click on the Use Bleed Settings of the Document checkbox [Fig.: 6.1]. The previously set bleed of 2.5mm should be displayed automatically. Finally, click on the Save PDF button. Your print-ready PDF file has now been saved in the folder you previously selected.